DIY tutorial for Dream Catcher
Have you been foraging the markets for the best dream catcher? Search no more. Today, I am going to teach you how to make a great and easy dream catcher right in your home in the exact way you have picturized it.
Before learning the process, let me take you through a quick journey of what a dream catcher is:
A dream catcher is a hoop that traps your bad dreams and allows only good dreams to pass through, as has been mostly said. They have emerged in the America during 1960s and 1970s and now have captured space in all homes in almost the entire world.
What is the story behind them?
Long ago there was a spider woman called Asibikaashi in the Ojibwe nation who used to take care of all the children in the nation. And the nation started to expand which made it complex for Asibikaashi to reach out to all the children every night. After a great deal of brain storming, mothers and grandmothers crafted dream catchers with available hoops, threads and other decorative items to filter out the bad dreams of their children.
Wasn’t it cute?
Well, straight away to our business now!
Preparing a dream catcher at home is not that tough. You only need a few supplies and the process is really quick.
Required items:
- A hoop (size as per your requirement)

- Needle

- Thread

- Beads

- Feathers

Process:
- Step1: You have to loop the hoop with a thread. Start at whatever end you wish and secure it to make it stand steady. Then loop the hoop till it reached the starting point again. Make sure the gaps are not visible. If you wish to give more character to your dream catcher, you can pick an octagonal or a decagonal shape. And the remaining process would remain almost the same.

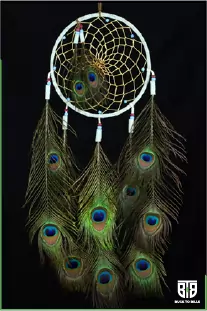
- STEP2: Now needle the thread through the looped thread and make whatever designs you wish to. For representational purposes, I am attaching pictures of a couple of designs to give you some creative ideas or to make your job easier.

- STEP3: If you like to have beads in your design, then make sure you needle the beads into your designs before securing the thread to the other corner of the loop. Because after securing the thread it becomes a bit harder to let them in the design. You can also paste them on the outer side of the hook, to make it look a bit unique.

- STEP4: Take the needle and thread again and knit a hanger at one end of the hook to use as a hanger. If you have no intention to hang or use it otherwise, the call is totally yours.

- Step5 (optional): You can add other decorative items, say, feathers, or hangings to make it look attractive. For example take laces, threads or beads and hang them on the other side of the hoop.

The materials required for making a dream catcher are pretty minimal and the time required is less too. So, rather than shopping and settling for an average design, you can create one of your own according your taste.